

In Russia, fintech and banking were still far from ideal, this is evidenced by, that people still use cash. And the departure of Visa and Mastercard from Russia pushed our fintech back decades.
![]()
In Russia, fintech and banking were still far from ideal, this is evidenced by, that people still use cash. And the departure of Visa and Mastercard from Russia pushed our fintech back decades.
![]()

Russians, being spoiled in terms of fintech in that form, where they were at the end 2021 year, may wonder, that not all banks in the world, turns, look like Tinkoff or Rocketbank, or even other well-known and little-known banks. Namely: have a mega app, where you can open accounts, issue virtual cards, attach them to any account, transfer money from and to a brokerage account quickly and easily, one swipe and click to confirm.
Due to the departure of Visa, Mastercard, JCB, Discovery from Russia, the problem of paying abroad has become very acute. What should the Russians do, who travel or move for a long time to another country, other than to go and open a local bank account.
We will review the situation for all foreigners, who came to Kazakhstan for a long time to work, study or to reunite with relatives or obtain a residence permit/citizenship. The problem, which they will face – to receive salaries or other payments, and so on, You will need local bank accounts. First things first – if you don't have a passport, no financial institution in this country will do business with you. therefore, make sure, that you have a passport, the term of which does not come out in the coming days and even months.
And So, let's move on to an overview and a detailed description of all banks, which I have personally tried, poke and use, because otherwise it will all be just words, backed up by nothing.
The sort order of banks in this post means nothing. Is it the popularity of the bank among the locals.
![]()
After a kernel upgrade you might notice that vmware doesn’t work anymore. It asks to recompile some modules but have no success doing this.
So here is a guide how to easily recompile modules and turn your VMWare back to live again:
sudo vmware-modconfig --console --install-all
It will give you errors, just ignore it. Run the following commands:
cd /lib/modules/$(uname -r)/misc
sudo /usr/src/linux-headers-$(uname -r)/scripts/sign-file sha256 /var/lib/shim-signed/mok/MOK.priv /var/lib/shim-signed/mok/MOK.der $(modinfo -n vmmon)
sudo /usr/src/linux-headers-$(uname -r)/scripts/sign-file sha256 /var/lib/shim-signed/mok/MOK.priv /var/lib/shim-signed/mok/MOK.der $(modinfo -n vmnet)
sudo modprobe vmnet && sudo modprobe vmmon
Then start VMware again and voila! It must work.
![]()
I was trying to build a new kernel module driver for nvidia but faced this issue without any additional info.
Building module:
cleaning build area…
‘make’ -j32 NV_EXCLUDE_BUILD_MODULES=” KERNEL_UNAME=5.4.0-104-generic IGNORE_CC_MISMATCH=” modules…(bad exit status: 2)
ERROR (dkms apport): binary package for nvidia: 510.47.03 not found
Error! Bad return status for module build on kernel: 5.4.0-104-generic (x86_64)
Consult /var/lib/dkms/nvidia/510.47.03/build/make.log for more information.
…done.
/etc/kernel/postinst.d/initramfs-tools:
update-initramfs: Generating /boot/initrd.img-5.4.0-104-generic
But then I tried to compile the module driver one more time, but this time I selected “No, do not compile DKMS module” and it throwed something like “gcc version mismatch” but I’d selected to ignore it and the module was sucessfully built.
Then I uninstalled the module using
sh ./NVidia-blabla-510.run --uninstalll
And installed it as a DKMS module again, but this time forced ignoring GCC version mismatch.
sh ./NVidia-blabla-510.run --no-cc-version-check
And this time it ran without errors!
Hope this might help with similar problem.
![]()
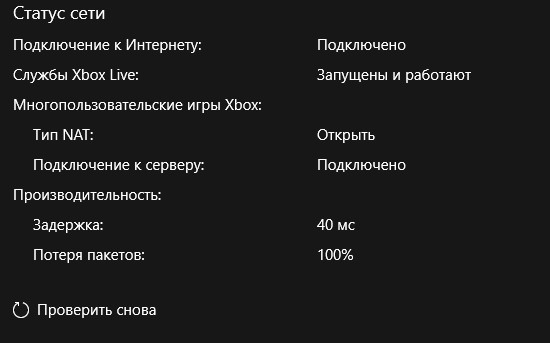
I’ve tried to play Gears 5 but wasn’t able to do it even with my own device which was present in the same network (connected to the same network).
Of course, I’ve tried a lot of variants, including these ones found on Microsoft answers
But none of that helped.
![]()
 SSH on Windows
What happens when Apple adds something new to their product? Yes, you are right – they will tell about it many times and everywhere trying to impress people by telling them their new invented stuff is really new even if it is not. So, imagine, if they have just added SSH support to their Mac OS X, would they spread this news or not? I believe this question will be left unanswered as OS X (as any other unix like operating system already supports SSH out of the box). As it comes to Windows, many developers who work on Windows for some reason were waiting for this day to come for many years fighting with windows installing cygwin and git binaries and trying to make them love each other but it always was difficult to do it. And with 2018 Windows 10 update Microsoft actually added OpenSSH for the Windows 10!… And nobody knows about it even now. So if you have at least Windows 10 1903 release you are able to setup git integration easily. That is what we will do here.
You have to download git binaries from here and install it. The process is very simple: agree with the agreement that you won’t read and press next, next, next…. until next button becomes the finish button. Pretty standard way though I recommend to change these settings as shown here
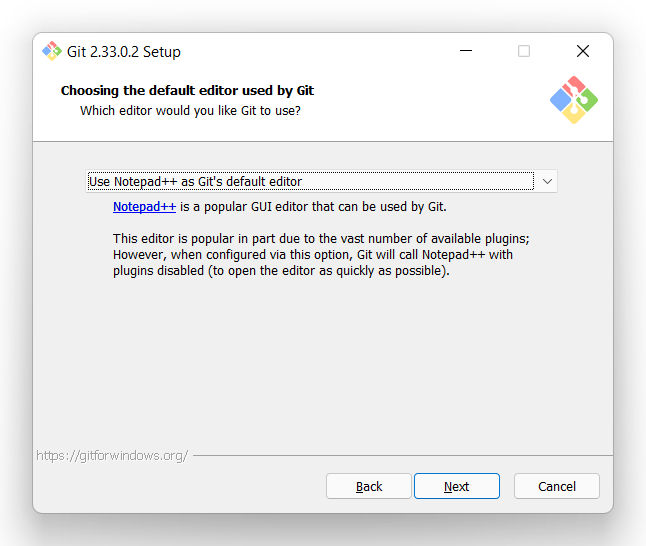

Ok, actually I lied here… SSH.exe is distributed with the git itself BUT we will not install it (last screenshot above).
Now, lets check if git is available. Go to desktop and create a folder named “git-repo-test”. No additional hacking skills needed here, just press RightMouseButton and Choose “Create a folder”.

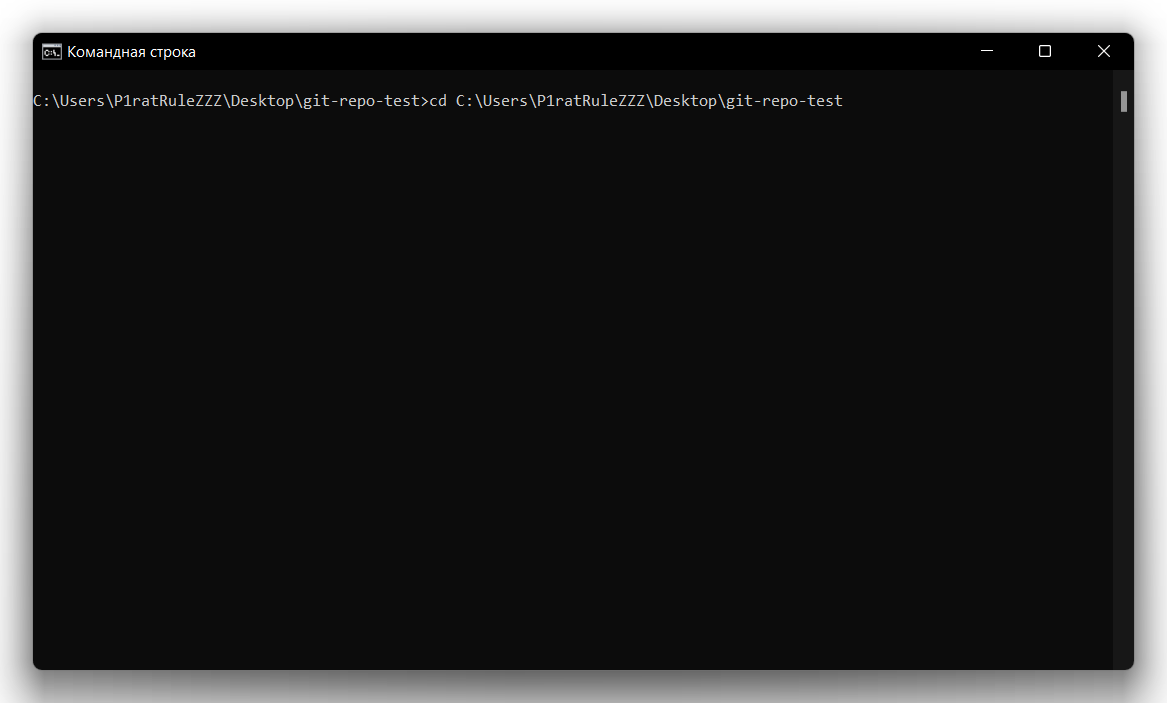
Succeed with this? AWESOME! Now open this folder with doubleclick, press Ctrl+L in the opened explorer window and you will be able to copy the path to the folder. Copy it. Then, go to searchbar at the left bottom and type “cmd” and open it.


In the opened console type “cd ” (space at the end) press rightmouse button to insert the copied text ( or shift+insert). and press enter.
Now type “git init”.

So, the repo is created!
Add your first file and commit it (note, first lines are needed to set your mail and name. Replace these values with your owns. These values will be displayed in github commits log)
git config user.email "[email protected]"
git config  user.name "John Doe"

echo "h1. This is the readme file." > README.md

git add README.md

git commit -m"Added a readme file".
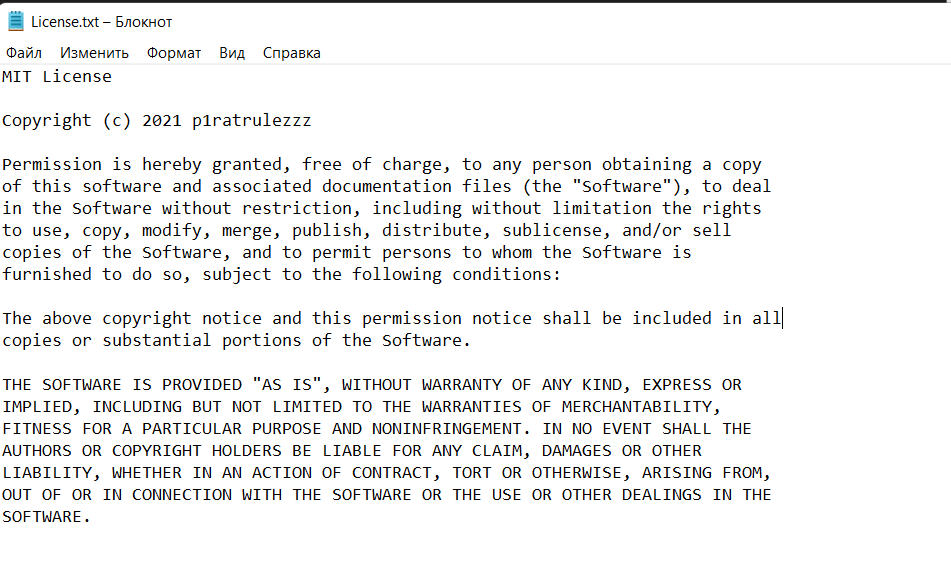
And add a license file. For that, go to https://choosealicense.com/ and select a license for your project. I will choose https://choosealicense.com/licenses/mit/ to allow all the other developers to use my project anyway as they want. What it you don’t select a license? Well, this means that other developers will not be allowed to use your project in any way, it will not be legal. So, create a new file (with a mouse and a notepad) and copy the license text, replace year in it and save.
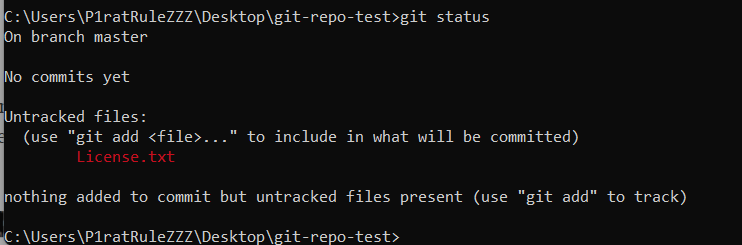
Check the repo status
git status
Add this file to be included in commit and commit it
git add License.txt

git commit
Note, this time we don’t use -m flag for git commit. This will open a window with notepad allowing you to enter some message for commit.

All the text after sharp sign are not included in the message, just ignore it. Write your message at the first line and close the notepad. The commit will be done.
So, we’ve added few files and commited them to LOCAL repo.
Easy? Let’s continue to the more complex part (hollywood movie like hacking skills will be required here).
Now, let’s create an SSH key. In the same console window type “ssh-keygen -t rsa -b 4096” and press enter. When it will request a password – just press enter to make it empty. Ok, the ssh key is created.

This will create 2 files: public key(id_rsa.pub) – share it with anyone you wont, make a tatoo with this text or write it on your carpet under the door – doesn’t matter. Absolutely safe to share it.
But the private key (id_rsa) – never share this with anyone! It is like a keys for your home or car. Keep it in secret!
View the public key by typing “notepad %userprofile%\.ssh\id_rsa.pub” . Copy this value.
Now, go to the github ssh key add page and paste you public key into the textarea, then press green button to submit.
 Ok, the SSH key is added. Lets create a repo and push your changes!
Create a new repo here https://github.com/new
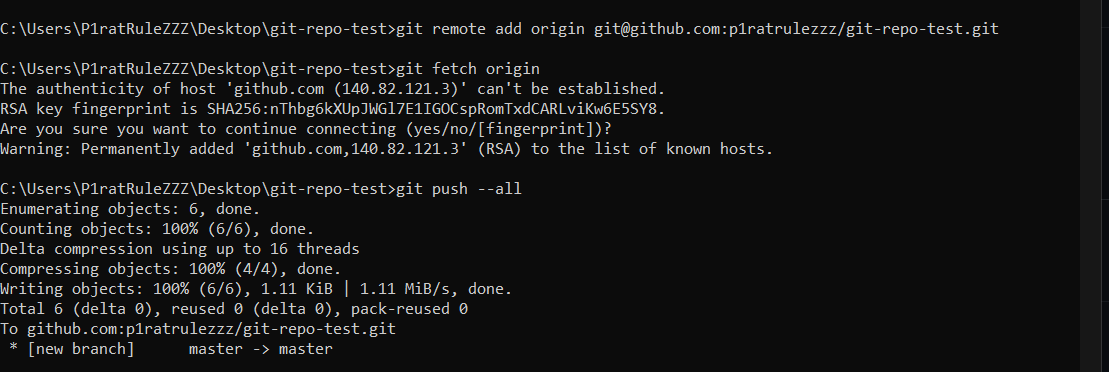
You will see some tutorial here, scroll down to the second paragraph and copy the first line (git remote add…)

Paste it in the console. And push all the changes to the remote.
git remote add ... - your line here

git fetch origin

git push --all
Note, further, in order to push something, you can use “git push origin main” (where main – is your branch name).
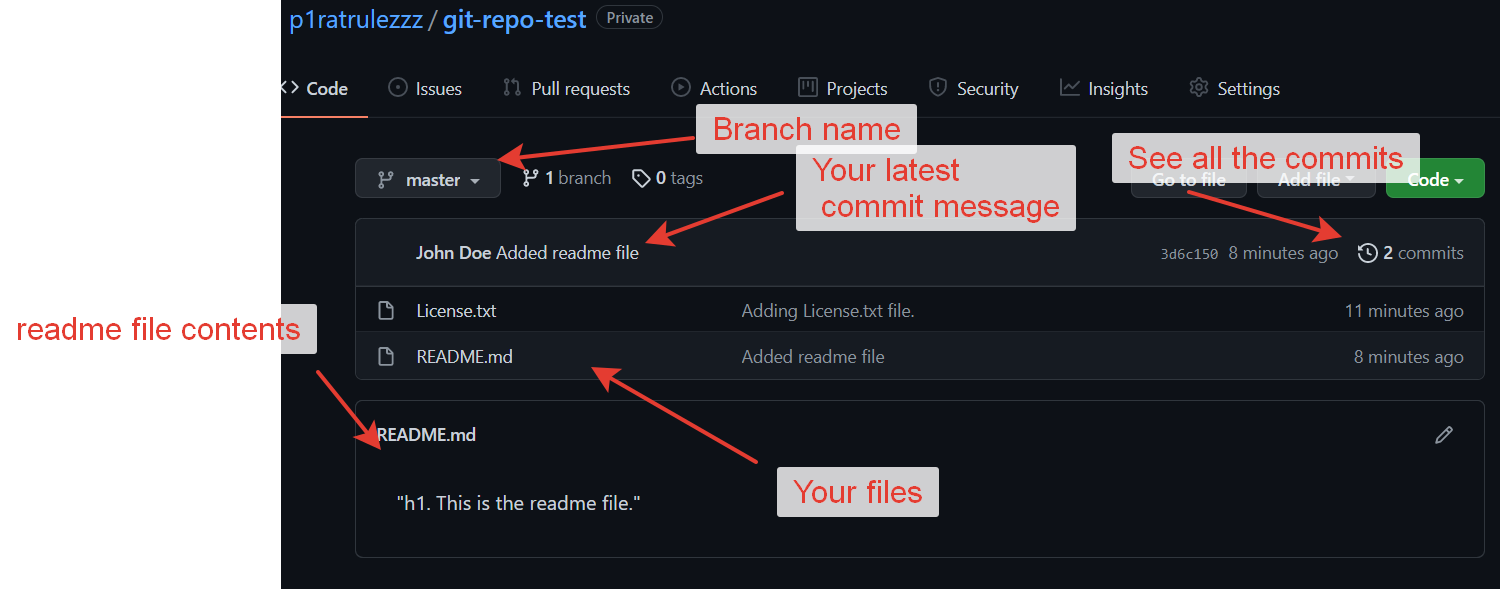
So, if you succeeded, go back to github and you will see your files on the github site.
Hope this tutorial will be useful.
![]()
